
I have a bunch of Valentine-y paper in my stash and decided to create a 3-D heart card for Valentine's Day. I bought a Martha Stewart heart shaped paper punch since I knew I could use it with future projects, but you could easily cut out a bunch of hearts, either free-hand or by tracing and cutting. I'm super pleased with how it turned out- it's cute and (fairly) simple to make - perfect for Valentine's Day, or for any time of the year when you want to tell someone you love and appreciate them.


Supplies:
- Valentine-y paper (or use magazine scraps that are red or pertinent to a color scheme you would like to use) - I used cardstock in this tutorial
- Blank white cardstock card (and envelope to put it in!) - I used a 4.25"x6" card
- Blank piece of cardstock to line the inside of the card and cover up the sewing - I used a red 4.25"x6" piece to line the card (this gave it a .25" white border on the inside- see picture below)
- Permanent adhesive
- Heart punch
- Scissors
- Sewing machine

Begin by punching (or cutting) out hearts from your paper- punch two of each design- I had 12 different patterns (my paper was double sided), and punched 2 of each. (*If you are cutting out hearts, you will need to decide how big they need to be depending on the size of your blank cardstock card.)

Arrange the hearts on the front of your card to your liking (I used a simple grid). These will be the "background" hearts and will be directly adhered onto the card. Adhere the "background" hearts with the permanent adhesive. Once you finish this step, you could even leave the card as-is like this and call it finished! :)

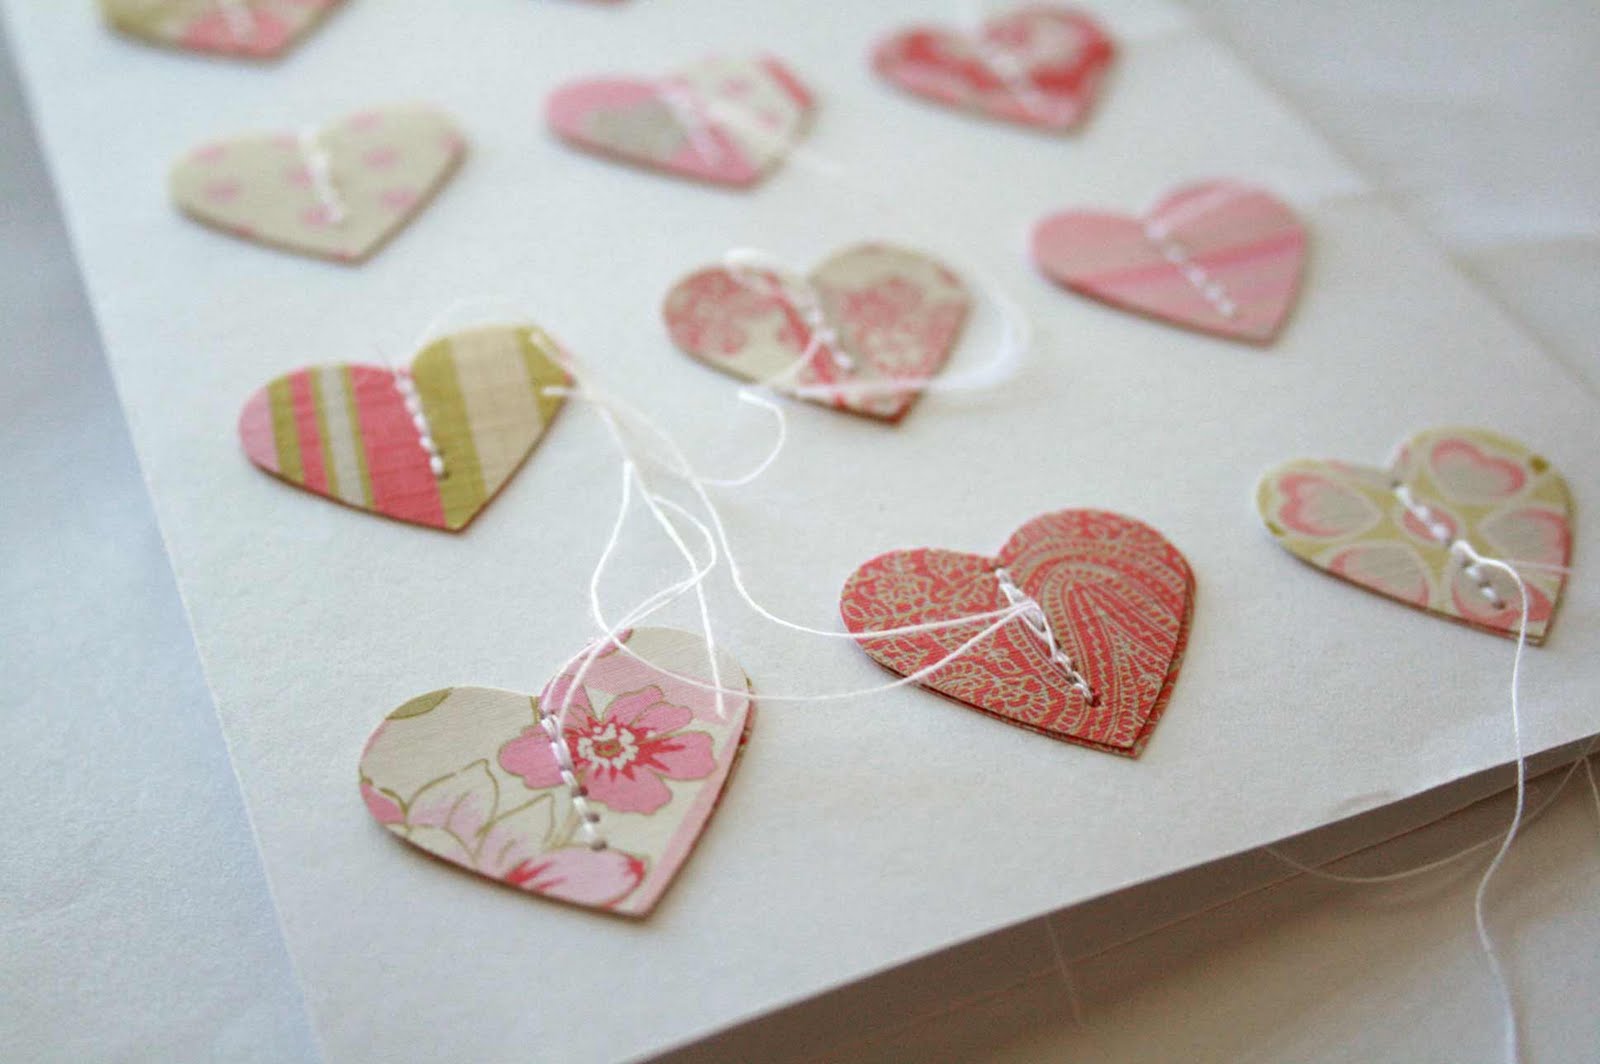
Next, take the matching heart, lay it on top of the already adhered "background" heart and sew a quick stitch and then a reverse stitch. Repeat with each heart.


Now, take the liner sheet of cardstock and adhere it to the inside of the card. This will help keep the stitches in place and keep from unraveling, as well as cover up the stitching. I also rolled some extra adhesive over top of the stitches.
 Now you have a lovely lined inside of your card with a nice .25" white border. Back to the front of the card-- gently fold up the top heart you just sewed down to create the 3-D effect.
  Voilà! A cute 3-D Valentine card. Perfect to give to your significant other, or perfect to send to a loved one or family member! Just write a message, seal it in the envelope and you're done :)


I've been looking for inspiration for this year's card. And I'm doing this one! Thank you for sharing it and for the tutorial. Mine might not turn out like this one though! Anyway, I'm definitely trying it!
ReplyDeleteThanks again! xx
Oh my goodness, this is so cute!!
ReplyDeleteI have always admired handmade cards but never thought I could do it...this has given me the inspiration to give cardmaking a go :)
Thanks so much for sharing
x
Great turorial! I love the look of the 3-D hearts!!! ~Val
ReplyDeleteWuuauu, so beautiful!!
ReplyDeletelovely and easy to achieve! Am going to give it a try...
ReplyDeletethanks for sharing this lovely idea! happy valentine's!
I made mine this afternoon, loved them, hope those who receive them will too! thanks again!
ReplyDeletedunno how to post pix for you...otherwise would like to show them to you...
I just love this card! Thank you for the tutorial, I think it's perfect for Mother's Day too :)
ReplyDeleteVery lovely card! Nice colors! Thanks for the tutorial!
ReplyDeleteI love your design - saw it on Pinterest. You have a beautiful site. Thank you!
ReplyDeleteТак свежо! Спасибо за красоту))
ReplyDeleteОтличная работа!
ReplyDeleteSo Cute!!! thanks for the idea!
ReplyDeleteI love it! I'm collecting ideas for cards with sewing techniques and this just made my list.
ReplyDeleteI loved this! Featured it on my Friday Favorite’s post today, hope you don’t mind:)
ReplyDeleteCheck it out if you wish!
http://agirlnamedleney.blogspot.com/2012/02/friday-im-in-love-valentines-day.html
<3 Leney
Very pretty
ReplyDeletelove these 'flowery' hearts. so pretty.
ReplyDeleteThank you!
ReplyDeletetried to repeat your wonderful postcard
my version here:
http://irishkashi.blogspot.com/2012/02/blog-post.html
Thankyou for sharing this one! I really love this card. Great!
ReplyDeleteWhat a great idea! Wonderfull. thx for tutorial! greetz from Holland!
ReplyDeleteCome and visit my blog: www.crea-mo.blogspot.com
;-)
Can you tell me if you used cardstock or paper?
ReplyDeleteI used cardstock :)
DeleteIt's a very very good idea not to hard to realised wich can be used with others pattern as flowers, eggs... Thank you very much!
ReplyDeleteSo lovely! I'm wondering if one can use glue instead? I wonder if it would hold it in place.
ReplyDeleteI really like your creativity. I will use a hot glue gun instead of stitching. My husband will appreciate this more than a store bought card. Thank you.
ReplyDelete