
Today (finally ;)) a tutorial on making these super cute jotter journals. These cuties would make great stocking stuffers for someone who likes to jot notes, or you could fill one up with pictures and words and give as a gift this holiday season.

Supplies (to make two journals):
+ 1 piece of cardstock, 8.5x11
+ 2 pieces of scrap fabric (I used fabric from some old blouses), slightly larger than 5.5"x8.5"
+ Spray adhesive (permanent)
+ ruler, rotary cutter and cutting mat
+ library card (or other sturdy credit card type card)
+ sewing machine and coordinating thread
+ 8 sheets (for each journal, 16 total) of paper cut to approximately 4.25"x8.5" (I used found papers like graph, ledger, and writing, but you could also use blank computer paper)
+ 2 butterfly binder clips
+ pencil, scissors, newspaper

Begin by cutting the sheet of cardstock in half to 5.5"x8.5".

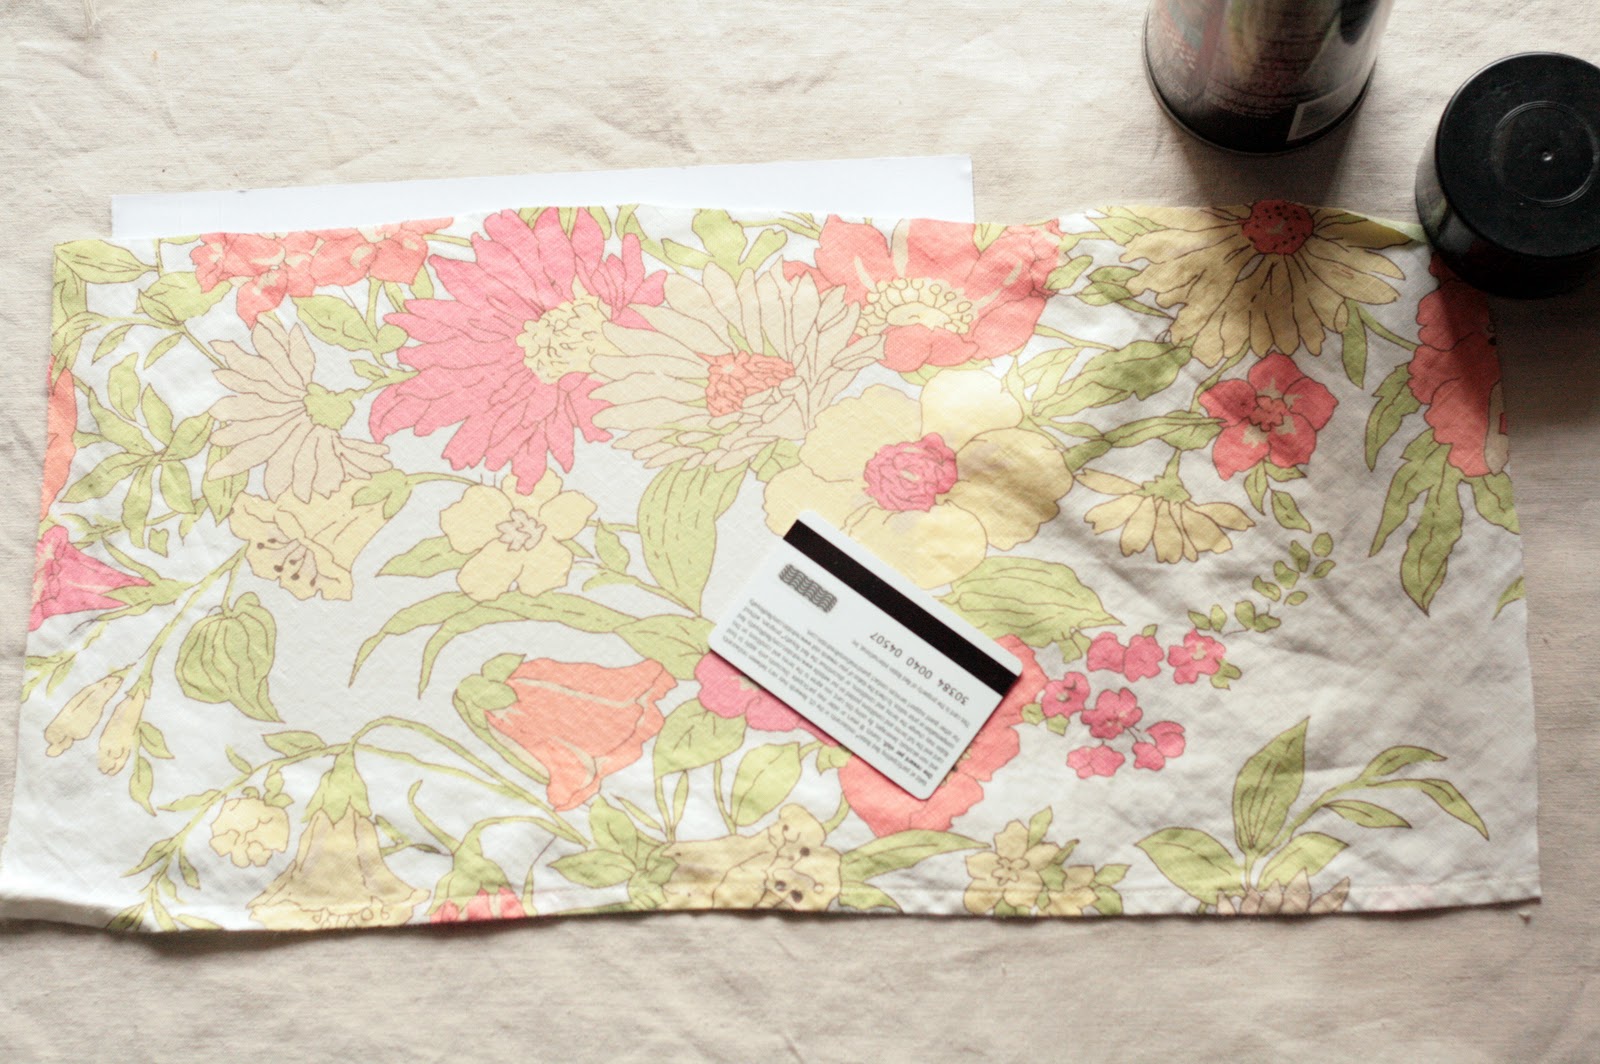
Outside, or in a well-ventilated area, lay out the newspaper and spray one of the cardstock pieces with the spray adhesive. Be sure to get the edges nice and good so that the fabric doesn't start to peel off. But don't spray too much or the glue will bleed through the fabric, and not dry (I know from experience). I usually wait about 30 seconds for the glue to begin drying before adhering the fabric.

Carefully lay the piece of fabric over the now-sticky piece of cardstock. Smooth out any bubbles with the library card so that it's all nice and flat. Repeat these steps with the other piece of cardstock.


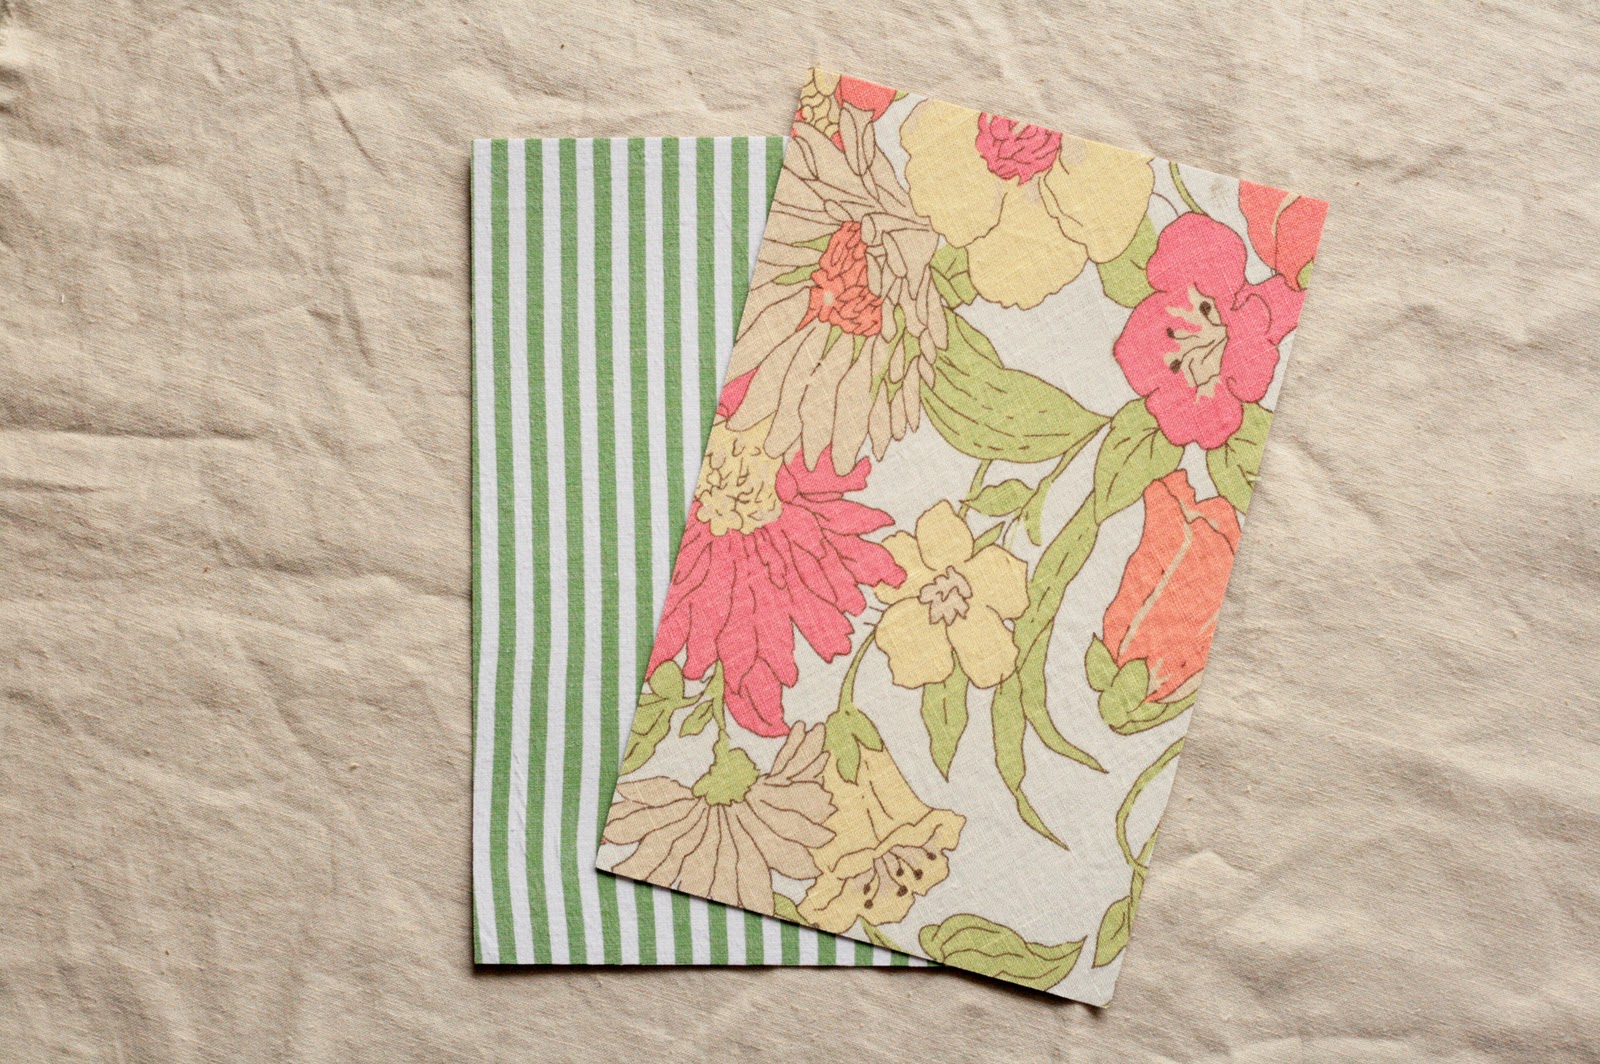


Voila! Two cute jotter journals. Ready for gift-giving or for jotting your own thoughts and ideas.


These are adorable little books! The uses are endless and they'd make great gifts for most anyone! Thanks for sharing :)
ReplyDeleteSuper cute! Glad you posted this.
ReplyDeleteThese look great with their fabric covers! I recently posted a tutorial about making similar jotters from airmail envelopes...similar idea with stitching up the middle to hold the papers in. If you are interested, please check it out at http://andria-drawingnear.blogspot.com!
ReplyDeletediggin your jotter journal...very clever AND handy indeed! thank you much :)
ReplyDeletewow! turns out, it's not that hard!! Love it! Thanks for sharing!
ReplyDeleteThanks!
ReplyDeleteThanks for this tutorial. Fast and easy gifts that are so colorful and useful.
ReplyDeleteThanks for this nice tutorial!
ReplyDeletethanks for sharing this wonderful tutorial. I might have to create a few of these.
ReplyDeleteThank you for the tutorial! I´ll try them!
ReplyDeleteGreat tutorial! I was curious to see how you fixed the fabric. I was playing around with a glue stick and that worked OK, but the fabric I have keeps unraveling a bit along the edge. Do you think the spray adhesive helps with that, or maybe it is the type of fabric I am using? Just wondered if you ran into that problem. :)
ReplyDeleteThanks!
Carol
You have so much variety of creations on your blog, oh how I wish to follow. :) Fabric is gorgeous! Great Ideas A+ <3 IT! x
ReplyDelete