 I posted about these mini journal notepads back in the summer and wanted to share a tutorial so you can make some of your own :) They're super easy to make and make fun journaling spots on a scrapbook layout or housed in a pocket in a journal or mini album. Or you could stick one in an envelope and send a cute note to a friend or family member.
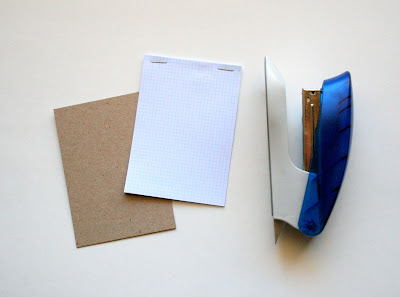
First, gather supplies and cut your papers to size. I also put chipboard on the back of each one, but that is optional and completely up to you. I liked that it made it more durable, but would probably leave it off if I were sending a note to a friend.
Supplies:
- 10-15 sheets of paper cut to 3" x 4.25" for each notepad you are making - these sheets can be notebook paper, graph paper or any sort of paper you can write on
- chipboard (optional) cut to 3" x 4.25" for each notepad
- decorative paper - 1 sheet cut to 3.5" x 2" for each notepad
- stapler and staples
- metal ruler, exacto blade or rotary cutter, cutting mat (or you could cut with scissors after drawing lines on the cut lines, just might not be as straight)
- sewing machine (or you can use glue or glue dots)
- embellishments such as buttons, felt shapes, prima flowers, jewel dot stickers
 2. Staple sheets for each pad together - this makes it easier to assemble instead of having 15 sheets of paper flying all over the place ;) I would have stapled it to the chipboard, but my chipboard was too thick.
 4. Layer each notepad: chipboard on the bottom, then your stapled sheets, with staples at the top end (these will get covered up), then the decorative paper slipped on top, like a hat (so, you will see 1" of decorative paper on the front and 1" on the back when you flip the notepad over). Stitch a straight stitch with a sewing machine, OR, using glue or glue dots, glue the pieces together- glue the decorative paper to the chipboard (on the back), then glue the last sheet of the notepad to the chipboard and then glue the decorative paper to the front of the stapled sheets. Basically make it look like this:


wow, they are great! thanks for the tutorial!!
ReplyDeletethese are really cute and a fun practice for when i get my new sewing machine!
ReplyDeletevery cool. I'll need to make some of these as little gifts to pop in with a letter. Thanks
ReplyDeletevery cute! thank you for the tutorial!
ReplyDeletemany blessings
patricia
Nice! I am so excited to make these and give away as cheap, but AWESOMELY homemade gifts! Thanks for sharing!!
ReplyDeleteSo cute! Great idea! TFS! These would make excellent gifts for my DH's co-workers!
ReplyDeleteHow cute! These would be great to tuck into all sorts of gifts, I am thinking inside bags that you make with coordinating fabric, thanks for sharing.
ReplyDeleteWhat a simple way to dress up a notepad! Thanks for sharing. I've posted a link.
ReplyDeleteidea and soooooooo easy but way to cute! Will give some to my sister in law for her b'day next weekend! Start right now making them! Thanx
ReplyDeleteMiranda
Hi
ReplyDeleteI'm Monica to Milan Italy
your tutorial is very nice I did an article on my blog about him.
if you want to come and see me.
Bye
Monica
beautiful idea!!!
ReplyDeletebeautiful! I've made a lots! XD
ReplyDeletegreat idea and beautiful tutorial...
I'm from Italy and i've linked your tut on my blog, in this post.
http://chiarahandmade.blogspot.com/2010/05/tutorial-da-web-quaderni-e-quadernini.html
thanks!
Gorgeous!! Beautiful tutorial too.. thanks! :o)
ReplyDeletelove the simplicity yet a totally functional little gift item!
ReplyDelete